I originally posted this recipe on my cookie blog, but I felt it was necessary to revisit it with a few newer photos. I received 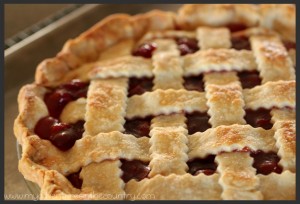 this recipe from my high school Foods teacher, many, many years ago and it has been my go-to recipe for pie crust ever since. It works extremely well for any type of pie, whether it be fruit, cream, or even a chicken pot pie. It’s super easy and I still use it in my classroom today. I hope you love this recipe as much as I do!
Super Easy Pie Crust
3 cups all-purpose flour
3/4 tsp salt
3/4 cup vegetable oil
1/4 cup + 2 tbsp milk
4 sheets of wax paper, equal lengths
1-2 tbsp milk for sealing
1/2-1 tsp sugar for top crust
Combine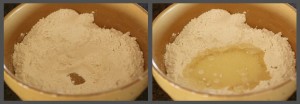 the flour and salt in a large bowl with a whisk and make a well.
In a 2 cup liquid measuring cup, combine the milk and oil (this just saves extra washing later). Pour the liquids into the well of the flour mixture and stir lightly with a fork or rubber scraper until just mixed. (You might see a little bit of the flour not quite mixed in and that’s okay, but the mixture should not look too dry or crumbly.)
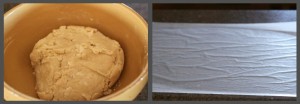
Divide the dough in half. Place a towel or Saran wrap over the other half to keep it moist. (This dough can dry out fast, so work quickly here.)
Next, place half the dough between two sheets of the wax paper. 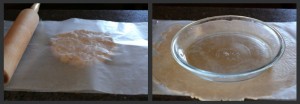 (I like to moisten my counter top slightly, with a damp washcloth. This helps keep the wax paper from slipping too much on the counter top.
Roll the dough into a large circle, large enough to fit your pie plate.
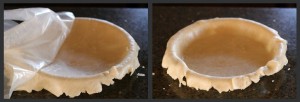
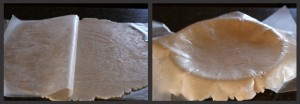 Gently peel back the top layer of wax paper and pick up the crust using the remaining layer of wax paper to help guide the crust over your pie plate. Gently turn the crust over and lay gently onto the plate.
Slowly peel the top layer of wax paper off the crust.
Working your way around the edge, gently lift the crust into the pie plate. Be careful not to stretch the crust into the plate or it might become too thin and tear. If this happens, just patch it with some of the extra crust.
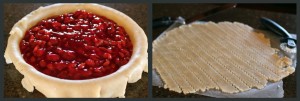 Next, fill your base crust with a filling of your choice.
If you choose to make a single crust for a cream pie, be sure to prick the crust with a fork before baking. This will help prevent large air pockets in your crust as it bakes. DO NOT poke the crust if you are using this for a fruit pie.
Repeat the steps for rolling the top crust, but before lifting the wax paper off, lightly wet the edge of your base crust with a small amount of milk. This will make the edge sticky and help the top crust form a nice seal on your pie.
For a standard two-crust pie, place the top crust on your pie filling and trim around the edges to dispose of extra crust. Once the edges are trimmed, flute with your desired method, and use a pastry brush to lightly coat the top crust with milk.
Then, sprinkle a little sugar over the milk to give the top crust a nice sparkle. Finally, cut slits in the top or use a mini cutter to cut an opening to allow steam to escape. Tip: place your pie on a cookie sheet to catch any overflow the bubbles over during baking. This will save a lot of time later! (I hate cleaning up oven spills!)
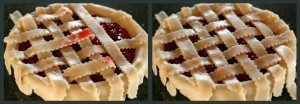
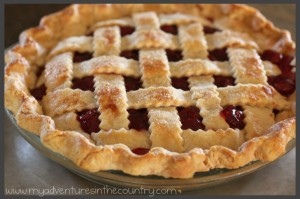
For a lattice top, cut the second crust into equal strips and place about an inch apart across the edge of the base crust.
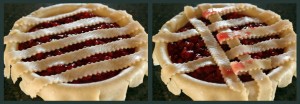 Peel back every other strip about half-way, then add the new strip perpendicular to the folded strips.
Fold down the strips over the newly added strip and continue alternating until pie is covered.
Trim edges and fold excess crust up over the lattice strips to form the edge. Flute the edges and repeat the milk and sugar application from above.
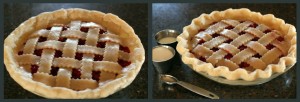
Baking times vary, but I like to bake my pies at 375 degrees for 45 minutes to an hour. Check the pie half-way through to make sure the edges of your crust aren’t browning too quickly. If they are, use a little bit of aluminum foil to cover them, leaving the top crust open for further browning.
Once the pie is done, remove it and place it on a wire rack to cool completely! Enjoy!!!

[…] & Cheddar Quiche Crust for one 9″ pie (I used my Super Easy Pie Crust Recipe, but reduced the amounts by one third). Here are the measurements for a single 9″ crust. […]